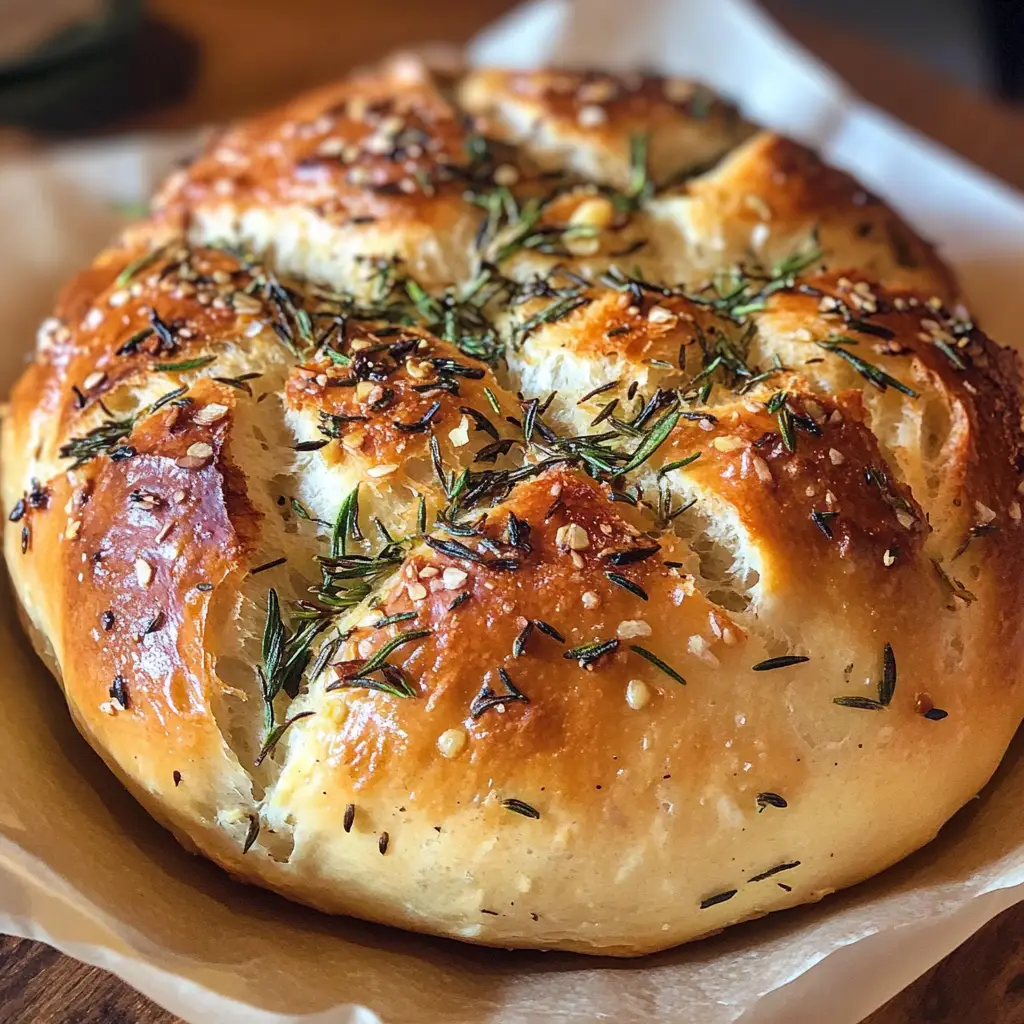
Introduction to Easy Roasted Garlic Rosemary Artisan Bread
Welcome to the world of baking, where the aroma of fresh bread can turn any ordinary day into something special! Today, I’m excited to share my recipe for Easy Roasted Garlic Rosemary Artisan Bread. This delightful bread is not just a treat for the senses; it’s a quick solution for busy moms and professionals like us. Imagine pulling a warm, golden loaf from the oven, infused with the rich flavors of roasted garlic and fragrant rosemary. It’s perfect for impressing your loved ones or simply enjoying a cozy night in. Let’s dive into this culinary adventure together!
Why You’ll Love This Easy Roasted Garlic Rosemary Artisan Bread
This Easy Roasted Garlic Rosemary Artisan Bread is a game-changer for your kitchen. It’s incredibly simple to make, even on the busiest days. The combination of roasted garlic and rosemary creates a flavor explosion that will have your family begging for more. Plus, the delightful aroma wafting through your home is an instant mood booster. Trust me, this bread will elevate any meal and make you feel like a culinary rockstar!
Ingredients for Easy Roasted Garlic Rosemary Artisan Bread
Gathering the right ingredients is the first step to creating your masterpiece. Here’s what you’ll need for this Easy Roasted Garlic Rosemary Artisan Bread:
- All-purpose flour: The backbone of your bread, providing structure and texture. You can substitute with whole wheat flour for a nuttier flavor.
- Active dry yeast: This little powerhouse helps your bread rise. Make sure it’s fresh for the best results.
- Warm water: Activates the yeast and brings the dough together. Aim for a temperature that feels warm to the touch, but not hot.
- Roasted garlic: Adds a sweet, mellow flavor that transforms your bread. You can roast a whole head of garlic in the oven or buy pre-roasted garlic for convenience.
- Fresh rosemary: This aromatic herb brings a fragrant touch to your bread. If you don’t have fresh, dried rosemary can work in a pinch, but use less.
- Salt: Enhances the flavors and strengthens the dough. Don’t skip this; it’s essential for taste!
- Sugar: A small amount helps activate the yeast and adds a hint of sweetness. You can use honey or maple syrup as alternatives.
For exact measurements, check the bottom of the article where you can find everything listed for easy printing. Now that you have your ingredients ready, let’s get baking!
How to Make Easy Roasted Garlic Rosemary Artisan Bread
Now that we have our ingredients ready, let’s roll up our sleeves and get started on this Easy Roasted Garlic Rosemary Artisan Bread! Follow these simple steps, and you’ll be on your way to baking a delicious loaf that will impress everyone.
Step 1: Preheat the Oven
First things first, preheat your oven to 450°F (230°C). Preheating is crucial because it creates the perfect environment for your bread to rise and develop that lovely crust. Think of it as warming up your kitchen for a cozy baking session!
Step 2: Prepare the Yeast Mixture
In a large bowl, combine warm water and sugar, then sprinkle the active dry yeast on top. Let it sit for about 5-10 minutes until it becomes frothy. This step is vital because it activates the yeast, ensuring your bread rises beautifully. If it doesn’t foam, your yeast might be old, and it’s best to start over.
Step 3: Combine Ingredients
Once your yeast is frothy, add the all-purpose flour, salt, roasted garlic, and fresh rosemary to the bowl. Mix everything together until a dough starts to form. The roasted garlic and rosemary will infuse your bread with incredible flavor, making it irresistible!
Step 4: Knead the Dough
Now it’s time to knead! Transfer the dough to a floured surface and knead for about 5-7 minutes. You want the dough to be smooth and elastic. If it’s too sticky, sprinkle a little more flour. A good test is to poke it; if it springs back, you’re ready to move on!
Step 5: First Rise
Place your kneaded dough in a greased bowl, cover it with a clean kitchen towel, and let it rise for about 1 hour. This is where the magic happens! The dough should double in size. To create a warm environment, you can place it in a slightly warm oven or a sunny spot in your kitchen.
Step 6: Shape the Loaf
After the first rise, punch down the dough gently to release the air. Shape it into a round loaf by tucking the edges under. This step is significant because it helps create a nice, round shape that bakes evenly. Plus, it’s oddly satisfying!
Step 7: Second Rise
Place your shaped loaf on a baking sheet lined with parchment paper. Cover it again and let it rise for another 30 minutes. This second rise is essential for achieving that light, airy texture. Patience is key here, so resist the urge to rush!
Step 8: Bake the Bread
Before baking, score the top of your loaf with a sharp knife. This allows steam to escape and helps the bread expand beautifully. Bake in your preheated oven for 25-30 minutes until it’s golden brown. You’ll know it’s done when it sounds hollow when tapped on the bottom.
Step 9: Cool and Slice
Once baked, let your bread cool on a wire rack. This step is crucial for the best texture. If you slice it too soon, the inside can become gummy. After about 20-30 minutes, grab a knife and enjoy your masterpiece!
Tips for Success
- Always use fresh yeast for the best rise.
- Measure your flour accurately; too much can lead to dense bread.
- Don’t rush the rising times; they’re crucial for texture.
- Experiment with different herbs for unique flavors.
- For a crustier loaf, place a pan of water in the oven while baking.
Equipment Needed
- Mixing bowl: A large bowl for combining ingredients. A sturdy pot can work too.
- Measuring cups and spoons: Essential for accuracy. Use a kitchen scale for precision.
- Floured surface: A clean countertop or cutting board for kneading.
- Baking sheet: A flat tray for baking. A cast-iron skillet can add a nice crust.
- Wire rack: For cooling the bread. A plate can suffice in a pinch.
Variations of Easy Roasted Garlic Rosemary Artisan Bread
- Cheesy Delight: Add shredded cheese, like mozzarella or cheddar, to the dough for a cheesy twist.
- Herb Medley: Mix in other fresh herbs like thyme or basil for a unique flavor profile.
- Olive Oil Infusion: Replace some of the warm water with olive oil for a richer taste and softer texture.
- Whole Wheat Option: Use whole wheat flour instead of all-purpose for a heartier, more nutritious loaf.
- Spicy Kick: Incorporate red pepper flakes or chopped jalapeños for a spicy version that packs a punch.
Serving Suggestions for Easy Roasted Garlic Rosemary Artisan Bread
- With Olive Oil: Serve warm with a drizzle of high-quality olive oil for dipping.
- Cheese Platter: Pair with a selection of cheeses like brie or goat cheese for a delightful appetizer.
- Soup Companion: Enjoy alongside a hearty soup, like tomato basil or minestrone, for a comforting meal.
- Salad Side: Serve with a fresh garden salad for a light lunch or dinner.
- Presentation: Slice the bread and arrange it on a wooden board for a rustic touch.
FAQs about Easy Roasted Garlic Rosemary Artisan Bread
Can I use instant yeast instead of active dry yeast?
Absolutely! You can substitute instant yeast for active dry yeast in this Easy Roasted Garlic Rosemary Artisan Bread recipe. Just mix it directly with the dry ingredients without needing to activate it in water first.
How do I store leftover bread?
To keep your Easy Roasted Garlic Rosemary Artisan Bread fresh, store it in an airtight container at room temperature for up to three days. For longer storage, slice it and freeze it in a freezer bag. Just pop it in the toaster when you’re ready to enjoy!
Can I add other ingredients to the dough?
<pCertainly! Feel free to experiment with different herbs, cheeses, or even nuts. Just remember that adding too many ingredients can affect the dough’s consistency, so adjust accordingly.
What can I serve with this bread?
This artisan bread pairs wonderfully with olive oil for dipping, a cheese platter, or a hearty soup. It’s versatile enough to complement any meal!
Why is my bread dense?
A dense loaf can result from using too much flour or not allowing the dough to rise long enough. Make sure to measure your flour accurately and be patient during the rising times for the best results.
Final Thoughts
Baking this Easy Roasted Garlic Rosemary Artisan Bread is more than just a recipe; it’s an experience that fills your home with warmth and love. The joy of pulling a golden loaf from the oven, with its irresistible aroma wafting through the air, is simply unmatched. Each slice is a testament to your effort, perfect for sharing with family or savoring during a quiet moment. Whether you’re a seasoned baker or just starting, this bread will surely become a cherished staple in your kitchen. So, roll up your sleeves and let the magic of baking unfold!
Print
Easy Roasted Garlic Rosemary Artisan Bread made Simple!
- Total Time: 1 hour 45 minutes
- Yield: 1 loaf 1x
- Diet: Vegetarian
Description
A simple and delicious recipe for artisan bread infused with roasted garlic and rosemary, perfect for any occasion.
Ingredients
- 3 cups all-purpose flour
- 1 packet (2 1/4 tsp) active dry yeast
- 1 1/2 cups warm water
- 1 head of garlic, roasted
- 2 tbsp fresh rosemary, chopped
- 1 tsp salt
- 1 tsp sugar
Instructions
- Preheat your oven to 450°F (230°C).
- In a large bowl, combine warm water, sugar, and yeast. Let it sit for 5-10 minutes until frothy.
- Add flour, salt, roasted garlic, and rosemary to the yeast mixture. Stir until a dough forms.
- Knead the dough on a floured surface for about 5-7 minutes until smooth.
- Place the dough in a greased bowl, cover, and let it rise for 1 hour or until doubled in size.
- Punch down the dough and shape it into a round loaf.
- Place the loaf on a baking sheet lined with parchment paper. Let it rise for another 30 minutes.
- Score the top of the loaf with a sharp knife and bake for 25-30 minutes until golden brown.
- Let the bread cool on a wire rack before slicing.
Notes
- For a stronger garlic flavor, add more roasted garlic.
- This bread can be stored in an airtight container for up to 3 days.
- Serve warm with butter or olive oil for dipping.
- Prep Time: 15 minutes
- Cook Time: 30 minutes
- Category: Bread
- Method: Baking
- Cuisine: Italian
Nutrition
- Serving Size: 1 slice
- Calories: 150
- Sugar: 0.5g
- Sodium: 200mg
- Fat: 1g
- Saturated Fat: 0g
- Unsaturated Fat: 0g
- Trans Fat: 0g
- Carbohydrates: 30g
- Fiber: 1g
- Protein: 4g
- Cholesterol: 0mg
Keywords: Easy Roasted Garlic Rosemary Artisan Bread, artisan bread, roasted garlic bread, homemade bread