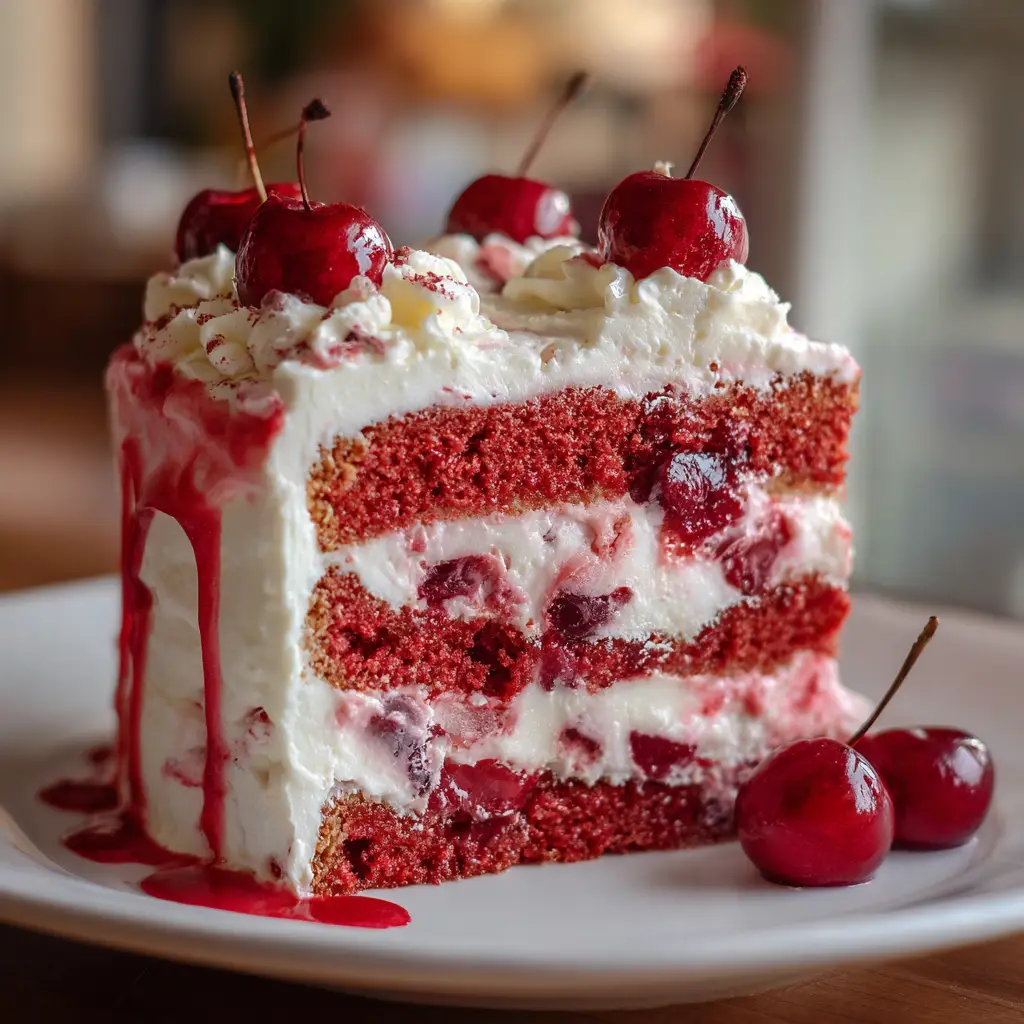
Introduction to Cherry Layer Cake with Cherry Cream Cheese Frosting
There’s something magical about a slice of Cherry Layer Cake with Cherry Cream Cheese Frosting that brings back sweet memories. Whether it’s a birthday, a family gathering, or just a Tuesday that needs a little sparkle, this cake is your go-to solution. I know how busy life can get, especially for us moms and professionals juggling a million things. This delightful cake is not only easy to whip up but also impresses everyone at the table. Trust me, the moment you serve it, you’ll see smiles all around!
Why You’ll Love This Cherry Layer Cake with Cherry Cream Cheese Frosting
This Cherry Layer Cake with Cherry Cream Cheese Frosting is a true crowd-pleaser! It’s incredibly easy to make, even on your busiest days. The vibrant cherry flavor dances on your taste buds, while the creamy frosting adds a luscious touch. Plus, it’s a versatile dessert that fits any occasion, from casual family dinners to festive celebrations. You’ll love how quickly it comes together, leaving you more time to enjoy with loved ones!
Ingredients for Cherry Layer Cake with Cherry Cream Cheese Frosting
Gathering the right ingredients is the first step to creating your Cherry Layer Cake with Cherry Cream Cheese Frosting. Here’s what you’ll need:
- All-purpose flour: This is the backbone of your cake, providing structure and texture.
- Granulated sugar: Sweetness is key! It helps create that delightful balance with the cherries.
- Unsalted butter: Softened butter adds richness and moisture, making your cake tender.
- Milk: This keeps the batter smooth and helps the cake rise beautifully.
- Large eggs: Eggs bind everything together and contribute to the cake’s fluffiness.
- Baking powder: This leavening agent ensures your cake rises to perfection.
- Vanilla extract: A splash of vanilla enhances the overall flavor, making it even more delicious.
- Cherry pie filling: This is the star of the show! It adds that luscious cherry flavor and moisture.
- Cream cheese: For the frosting, cream cheese provides a tangy richness that pairs perfectly with cherries.
- Powdered sugar: This sweetens the frosting and gives it that smooth, creamy texture.
- Additional cherry pie filling: Used in the frosting, it adds a burst of cherry goodness.
For those looking to switch things up, consider using fresh cherries for a richer flavor. You can also store any leftovers in the refrigerator for up to three days. If you want to prepare ahead, this cake can be made a day in advance for even better flavor!
Exact measurements for each ingredient can be found at the bottom of the article, ready for you to print and take to the kitchen!
How to Make Cherry Layer Cake with Cherry Cream Cheese Frosting
Now that you have all your ingredients ready, let’s dive into the fun part—making your Cherry Layer Cake with Cherry Cream Cheese Frosting! Follow these simple steps, and you’ll have a stunning cake that’s sure to impress.
Step 1: Preheat the Oven
First things first, preheat your oven to 350°F (175°C). Preheating is crucial because it ensures your cake bakes evenly. If you skip this step, your cake might end up dense or unevenly cooked. So, let that oven warm up while you prepare the batter!
Step 2: Cream the Butter and Sugar
In a large bowl, cream together the softened butter and granulated sugar until the mixture is light and fluffy. This process is essential for creating a tender cake texture. The air you incorporate while creaming helps the cake rise beautifully. It’s like giving your cake a little boost!
Step 3: Add Eggs and Flavorings
Next, add the eggs one at a time, mixing well after each addition. Eggs are the glue that holds everything together, adding moisture and fluffiness. Don’t forget to stir in the vanilla extract and cherry pie filling at this stage. These ingredients will infuse your batter with delightful flavors!
Step 4: Combine Dry Ingredients
In another bowl, whisk together the all-purpose flour and baking powder. Mixing these dry ingredients separately helps distribute the baking powder evenly throughout the flour. This step is key to ensuring your cake rises properly and has a light texture.
Step 5: Mix Wet and Dry Ingredients
Now, it’s time to combine the wet and dry ingredients. Gradually add the flour mixture to the butter mixture, alternating with the milk. This method helps achieve the right batter consistency. You want a smooth, pourable batter, not too thick or too runny. Mix until just combined—overmixing can lead to a tough cake!
Step 6: Bake the Cakes
Divide the batter evenly between two greased 9-inch round cake pans. Bake in your preheated oven for 25-30 minutes. To check for doneness, insert a toothpick into the center of the cakes. If it comes out clean, they’re ready! If not, give them a few more minutes.
Step 7: Cool the Cakes
Once baked, let the cakes cool in the pans for about 10 minutes. Then, carefully transfer them to wire racks to cool completely. Cooling is crucial because frosting a warm cake can lead to a melty mess. Patience is key here!
Step 8: Prepare the Frosting
While the cakes cool, let’s whip up that luscious cherry cream cheese frosting! Beat the softened cream cheese until smooth. Gradually add the powdered sugar and the additional cherry pie filling, mixing until well combined. This frosting is creamy, tangy, and oh-so-delicious!
Step 9: Assemble the Cake
Once the cakes are completely cool, it’s time to assemble! Place one layer on a serving plate and spread a generous amount of frosting on top. Add the second layer and frost the top and sides of the cake. For a beautiful finish, you can even add some extra cherry pie filling on top for a pop of color and flavor!
Tips for Success
- Always measure your ingredients accurately for the best results.
- Use room temperature ingredients for a smoother batter.
- Don’t skip the cooling step; it prevents frosting from melting.
- For a fun twist, add almond extract to the batter.
- Decorate with fresh cherries for a stunning presentation.
Equipment Needed
- Two 9-inch round cake pans (or use one pan and bake in batches).
- Mixing bowls (a large one for the batter and a smaller one for the frosting).
- Electric mixer (a whisk works too, but it’ll take longer).
- Measuring cups and spoons for accuracy.
- Wire racks for cooling the cakes.
Variations of Cherry Layer Cake with Cherry Cream Cheese Frosting
- Fresh Cherry Delight: Swap out the cherry pie filling for fresh cherries. This adds a burst of natural flavor and a beautiful pop of color.
- Chocolate Cherry Cake: Incorporate cocoa powder into the batter for a rich chocolate twist. Pair it with the cherry cream cheese frosting for a decadent treat.
- Gluten-Free Option: Use a gluten-free all-purpose flour blend to make this cake gluten-free. It’s just as delicious!
- Vegan Version: Replace eggs with flaxseed meal and use plant-based butter and milk. The cake will still be moist and flavorful.
- Almond Cherry Cake: Add a teaspoon of almond extract to the batter for a delightful nutty flavor that complements the cherries beautifully.
Serving Suggestions for Cherry Layer Cake with Cherry Cream Cheese Frosting
- Pair with a scoop of vanilla ice cream for a delightful contrast.
- Serve alongside a fresh fruit salad for a refreshing touch.
- Complement with a cup of hot coffee or tea to enhance the flavors.
- Garnish with fresh cherries or mint leaves for a beautiful presentation.
- Slice and serve on colorful plates to brighten up your dessert table!
FAQs about Cherry Layer Cake with Cherry Cream Cheese Frosting
As you embark on your baking adventure with this Cherry Layer Cake with Cherry Cream Cheese Frosting, you might have a few questions. Here are some common queries I’ve encountered, along with helpful answers!
Can I use fresh cherries instead of cherry pie filling?
Absolutely! Fresh cherries can elevate the flavor of your cake. Just pit and chop them before adding to the batter. They’ll add a delightful burst of freshness!
How do I store leftover cake?
Store any leftover cake in an airtight container in the refrigerator. It will stay fresh for up to three days. Just be sure to let it come to room temperature before serving for the best taste!
Can I freeze this cake?
Yes, you can freeze the cake! Wrap it tightly in plastic wrap and then in aluminum foil. It can be frozen for up to three months. Just thaw it in the fridge overnight before serving.
What can I substitute for cream cheese in the frosting?
If you’re looking for a lighter option, you can use Greek yogurt or mascarpone cheese. They’ll give you a creamy texture, but the flavor will be slightly different.
How can I make this cake more festive for special occasions?
To make your Cherry Layer Cake even more festive, consider adding colorful sprinkles on top or decorating with fresh cherries and mint leaves. A drizzle of chocolate ganache can also add a touch of elegance!
Final Thoughts
Baking this Cherry Layer Cake with Cherry Cream Cheese Frosting is more than just a recipe; it’s an experience filled with joy and love. Each slice brings a smile, reminding us of the sweet moments shared with family and friends. The vibrant cherry flavor and creamy frosting create a delightful harmony that’s hard to resist. Whether it’s a special occasion or a simple gathering, this cake is sure to be the star of the show. So, roll up your sleeves, embrace the process, and let this cake bring a little bliss into your life!
Print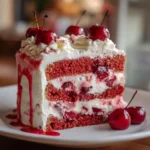
Cherry Layer Cake with Cherry Cream Cheese Frosting is Bliss!
- Total Time: 1 hour
- Yield: 12 servings 1x
- Diet: Vegetarian
Description
A delightful Cherry Layer Cake topped with creamy Cherry Cream Cheese Frosting, perfect for any celebration.
Ingredients
- 2 cups all-purpose flour
- 1 ½ cups granulated sugar
- ½ cup unsalted butter, softened
- 1 cup milk
- 3 large eggs
- 2 teaspoons baking powder
- 1 teaspoon vanilla extract
- 1 cup cherry pie filling
- 8 oz cream cheese, softened
- 4 cups powdered sugar
- ½ cup cherry pie filling (for frosting)
Instructions
- Preheat the oven to 350°F (175°C).
- In a large bowl, cream together the butter and sugar until light and fluffy.
- Add the eggs one at a time, mixing well after each addition.
- Stir in the vanilla extract and cherry pie filling.
- In another bowl, combine the flour and baking powder.
- Gradually add the dry ingredients to the wet mixture, alternating with milk, until well combined.
- Divide the batter evenly between two greased 9-inch round cake pans.
- Bake for 25-30 minutes or until a toothpick inserted in the center comes out clean.
- Let the cakes cool in the pans for 10 minutes, then transfer to wire racks to cool completely.
- For the frosting, beat the cream cheese until smooth, then gradually add the powdered sugar and cherry pie filling until well combined.
- Once the cakes are cool, spread frosting between the layers and on top of the cake.
Notes
- For a richer flavor, use fresh cherries instead of pie filling.
- Store leftovers in the refrigerator for up to 3 days.
- This cake can be made a day in advance for better flavor.
- Prep Time: 30 minutes
- Cook Time: 30 minutes
- Category: Dessert
- Method: Baking
- Cuisine: American
Nutrition
- Serving Size: 1 slice
- Calories: 350
- Sugar: 30g
- Sodium: 200mg
- Fat: 15g
- Saturated Fat: 8g
- Unsaturated Fat: 5g
- Trans Fat: 0g
- Carbohydrates: 50g
- Fiber: 1g
- Protein: 4g
- Cholesterol: 50mg
Keywords: Cherry Layer Cake, Cherry Cream Cheese Frosting, Dessert Recipe