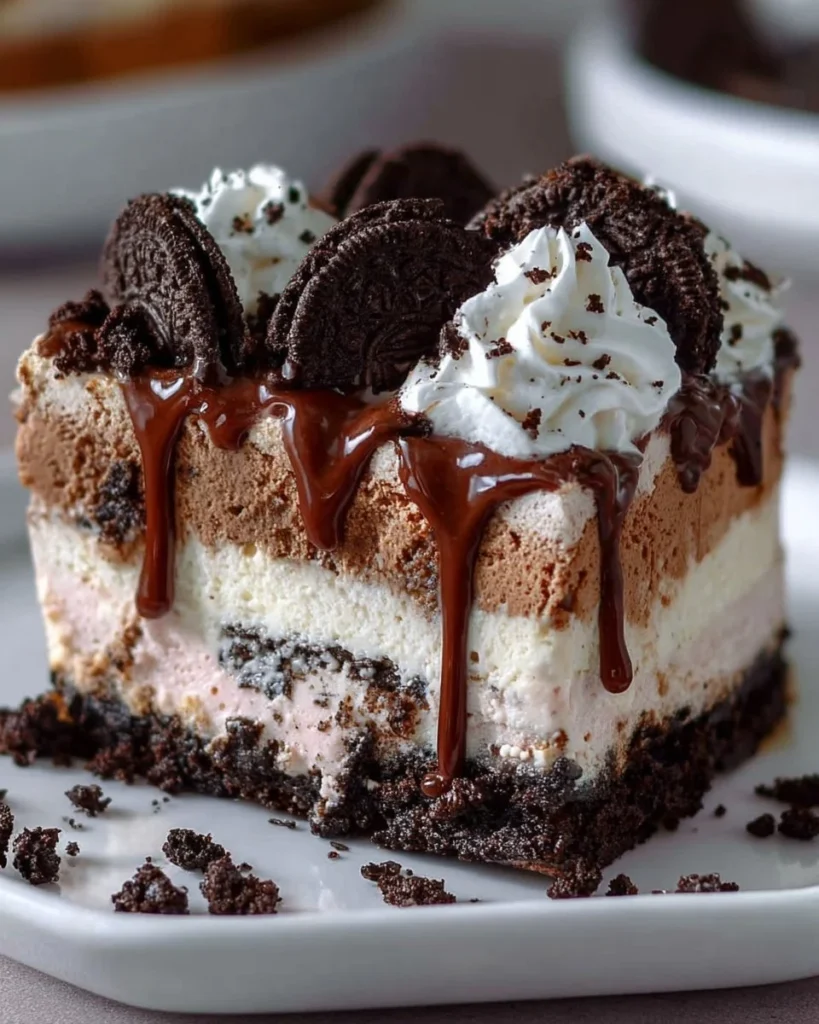
Craving a nostalgic taste of summer? Imagine slicing into a rich, cool cake that combines layers of creamy ice cream, crunchy chocolate cookies, and velvety chocolate syrup. With each forkful, you dive deeper into a delightful blend of textures that dance across your palate. The familiar taste instantly transports you back to carefree days spent at your favorite diner, wrapped in laughter and sunshine. This homemade version of the beloved Dairy Queen Ice Cream Cake not only satisfies your sweet tooth, but it also evokes cherished memories that warm the soul.
As you slice through the cake, your senses awaken to the enchanting aroma of chocolate mingling with the soft, sweet notes of vanilla and fresh whipped cream. The layers reveal themselves like hidden treasures, each bite giving way to creamy richness and a satisfying crunch. Whether it’s a birthday celebration, an impromptu backyard gathering, or simply a Tuesday that needs a touch of magic, this ice cream cake is destined to become a tradition in your home. It beckons everyone to the table, a showstopper that brings smiles and sweet relief on warm days.
Why You’ll Love This Copycat Dairy Queen Ice Cream Cake
Who doesn’t love an ice cream cake? This sensational dessert boasts layers of flavor that hit all the right notes. With just a few simple ingredients, you craft a rich treat that’s bound to impress. The creamy ice cream layers match perfectly with the crispness of the Oreo crust, creating a delightful contrast that dances across your taste buds.
Perfect for birthdays or any festive occasion, this cake stands out by allowing you to customize flavors to suit every palate. Choose classic vanilla or mix it up with decadent chocolate or fruity strawberry—each combination invites a unique tasting experience. As a bonus, making this cake at home means you can manage the ingredients, resulting in a fresher, more wholesome dessert than store-bought options. Indulge in your favorite flavors, family-style!
Preparation Phase & Tools to Use
Preparing your own ice cream cake may seem daunting, but with the right tools, you’ll find it a breeze! Here’s what you’ll need:
- Springform Pan: This versatile pan makes it easy to remove your ice cream cake without damaging its beautiful layers. The ability to release the sides is essential for presentation.
- Food Processor or Rolling Pin: You’ll use one of these tools to crush your Oreo cookies into the perfect crumbly texture for the crust, allowing it to hold together beautifully.
- Mixing Bowls: You’ll need a few of these for mixing? You’ll combine the crushed cookies with butter and layer the ice creams, so having different sizes makes the process smoother.
Pro tip: Always have your ice cream slightly softened before beginning. Taking it out of the freezer 10-15 minutes before you start will make it much easier to spread!
Ingredients for Copycat Dairy Queen Ice Cream Cake
For this delicious treat, gather the following ingredients:
- 2 pints of ice cream: Your choice of flavors like vanilla, chocolate, or strawberry. Feel free to mix and match!
- 1 package of Oreo cookies: The star of the crust, providing that irresistible crunch.
- 1/2 cup of chocolate syrup: This brings richness and adds a beautiful sheen.
- 1/2 cup of whipped cream: A fluffy cloud-like layer that elevates the cake’s texture.
- 1/4 cup of crushed nuts (optional): Adds an extra layer of crunch that complements the creaminess.
- 2 tablespoons of melted butter: This holds the Oreo crust together, adding richness to the texture.
Are you looking for alternatives? Try using graham crackers for a different flavor profile or a non-dairy ice cream for a vegan version. The possibilities are endless!
How to Make Copycat Dairy Queen Ice Cream Cake
-
Crush the Oreos: Start by placing the Oreo cookies in a food processor and pulse until they become fine crumbs. Alternatively, you can seal the cookies in a plastic bag and crush them with a rolling pin—fun for kids!
-
Prepare the Crust: In a mixing bowl, combine the crushed Oreos with melted butter, stirring until fully combined. The mixture should resemble wet sand.
-
Form the Base: Press the Oreo mixture into the bottom of your springform pan, creating an even layer. Freeze the crust for about 10 minutes to help it set.
-
Add Ice Cream: Remove the crust from the freezer and scoop in one pint of softened ice cream. Smooth it out with a spatula to create a flat, even layer.
-
Drizzle with Chocolate: Generously drizzle chocolate syrup over the ice cream, allowing it to seep into the layer underneath.
-
Whipped Cream Layer: For an optional touch of lightness, add a layer of whipped cream over the chocolate syrup. Spread it evenly for a beautiful finish.
-
Chill Again: Place the cake back into the freezer for about 15-20 minutes so that the chocolate and whipped cream can set.
-
Top Layer of Ice Cream: Once set, scoop the second pint of ice cream onto the cake. Spread it evenly and freeze until solid, which usually takes about 2 hours.
-
Finish It Off: Just before serving, top your cake with more whipped cream and sprinkle crushed nuts for an elegant crunch.
Chef’s Notes & Helpful Tips
- Make-Ahead Tips: You can prepare this cake one day ahead of time, allowing the flavors to develop beautifully. Just remember to keep it well-covered in the freezer.
- Cooking Alternatives: If you’re short on time, consider using a premade Oreo pie crust and store-bought ice cream for a quicker version.
- Customization Ideas: Experiment with different flavor combinations! Try peppermint ice cream with a chocolate crust for the holidays or layer in fruity sorbet for a refreshing summer twist.
Common Mistakes to Avoid
When making this dessert, watch out for these common pitfalls:
- Too Hard to Slice: If your ice cream cake freezes for too long, it can become rock-hard. Allow it to sit at room temperature for about 10-15 minutes before slicing.
- Crust Falling Apart: Ensure the Oreo crust is well mixed with melted butter and firmly pressed into the pan. A loose crust leads to crumbles when slicing.
- Ice Cream Too Soft: If your ice cream is too melted at the start, you may lose the beautiful layers. Always allow it to soften just enough to spread smoothly.
What to Serve With Copycat Dairy Queen Ice Cream Cake
Pair this delightful ice cream cake with some delicious accompaniments:
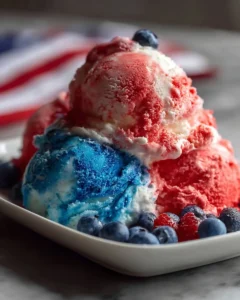
- Fresh Berries: Strawberries, raspberries, or blueberries add a refreshing balance and a pop of color.
- Chocolate Sauce: A little extra drizzle on each slice amplifies the dessert experience, making it even more decadent.
- Espresso or Coffee: The robust flavors of coffee complement the sweetness wonderfully, making for a perfect dessert pairing.
- Ice Cream Cones: Serve alongside cones for a fun, interactive treat.
- Nuts: Offer an extra crunch on the side if you didn’t incorporate them into the cake.
- Fudge Sauce or Caramel: Drape these sweet sauces over the top of each slice for indulgence overload.
- Scoop of Vanilla Ice Cream: Add a side of classic vanilla for a nostalgic touch.
Storage & Reheating Instructions
To preserve the beauty of your ice cream cake, it’s best to keep it stored in the freezer. Wrap it tightly in plastic wrap, then in aluminum foil to prevent freezer burn. It can stay fresh for up to two weeks. When you’re ready to indulge, simply slice and enjoy straight from the freezer.
Estimated Nutrition Information
Each slice of this indulgent ice cream cake contains approximately:
- Calories: 350
- Total Fat: 20g
- Saturated Fat: 10g
- Carbohydrates: 40g
- Sugars: 28g
- Protein: 5g
(Keep in mind these values are estimates and can vary based on specific ingredients chosen.)
FAQs
1. Can I use different types of cookies for the crust?
Absolutely! Try using chocolate chip cookies, graham crackers, or even gluten-free cookie alternatives. The key is to ensure they can be crushed easily and mix well with butter.
2. Is it possible to make this cake dairy-free?
Yes! Use dairy-free ice cream and ensure your whipped topping is non-dairy as well. You can opt for coconut whipped cream for added flavor.
3. What’s the best way to slice an ice cream cake?
For clean slices, dip your knife in warm water before cutting. This helps the knife glide through the firm layers without pulling apart the cake.
4. How can I make a smaller cake?
You can easily reduce the recipe by half and bake it in a smaller pan, like an 8-inch springform, for a more intimate gathering.
5. What if I want to add more layers?
Feel free to get creative! Layer different flavors of ice cream or add more layers of whipped cream and chocolate syrup for a show-stopping, multi-tiered cake.
Conclusion
This Copycat Dairy Queen Ice Cream Cake invites everyone to gather around the table and share a slice of happiness. With its layers of creamy ice cream, crunchy Oreo crust, and extra chocolate bliss, each bite fills you with warmth and nostalgia. Bring a piece of joy to your next gathering and create unforgettable memories. So, what are you waiting for? Grab your ingredients, roll up your sleeves, and treat yourself and your loved ones to a delightful homemade ice cream cake adventure!
Print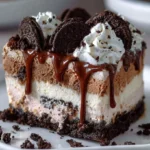
Copycat Dairy Queen Ice Cream Cake
- Total Time: 150 minutes
- Yield: 8 servings 1x
- Diet: Vegetarian
Description
A nostalgic ice cream cake with layers of creamy ice cream and a crunchy Oreo crust, perfect for any celebration.
Ingredients
- 2 pints of ice cream (your choice of flavors)
- 1 package of Oreo cookies
- 1/2 cup of chocolate syrup
- 1/2 cup of whipped cream
- 1/4 cup of crushed nuts (optional)
- 2 tablespoons of melted butter
Instructions
- Crush the Oreos in a food processor until fine crumbs form.
- Combine crushed Oreos with melted butter in a mixing bowl until mixed well.
- Press the Oreo mixture into the bottom of a springform pan to create an even layer. Freeze crust for about 10 minutes.
- Scoop one pint of softened ice cream into the crust, smoothing out with a spatula.
- Drizzle chocolate syrup generously over the ice cream.
- Add a layer of whipped cream on top of the chocolate syrup.
- Chill the cake again in the freezer for 15-20 minutes.
- Scoop the second pint of ice cream on top, spreading it evenly, and freeze until solid (about 2 hours).
- Top with more whipped cream and sprinkle with crushed nuts before serving.
Notes
You can prepare this cake a day in advance. Keep it well-covered in the freezer for optimal flavor.
- Prep Time: 30 minutes
- Cook Time: 0 minutes
- Category: Dessert
- Method: No-Bake
- Cuisine: American
Nutrition
- Serving Size: 1 slice
- Calories: 350
- Sugar: 28g
- Sodium: 210mg
- Fat: 20g
- Saturated Fat: 10g
- Unsaturated Fat: 8g
- Trans Fat: 0g
- Carbohydrates: 40g
- Fiber: 2g
- Protein: 5g
- Cholesterol: 25mg
Keywords: ice cream cake, dessert, Oreo cake, nostalgic dessert, summer treat