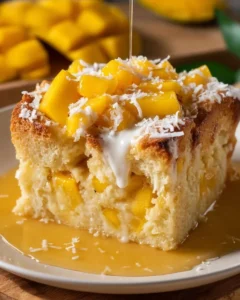
Introduction to Halloween Icebox Cake
As the leaves turn and the air gets crisp, I find myself dreaming of festive treats that bring joy to my family. This Halloween Icebox Cake is just that—a delightful, no-bake dessert that’s as easy to whip up as it is to devour. Perfect for busy moms like us, it requires minimal effort but delivers maximum flavor. Whether you’re hosting a spooky gathering or just want to surprise your loved ones, this cake is sure to impress. Let’s dive into this sweet adventure that captures the spirit of Halloween!
Why You’ll Love This Halloween Icebox Cake
This Halloween Icebox Cake is a lifesaver for busy days. It’s quick to prepare, taking just 20 minutes of your time, and then it does all the hard work in the fridge. The creamy pumpkin filling paired with chocolate wafer cookies creates a delightful contrast that’s simply irresistible. Plus, it’s a no-bake dessert, so you can enjoy the fun of Halloween without heating up the kitchen!
Ingredients for Halloween Icebox Cake
Gathering the right ingredients is the first step to creating this delightful Halloween Icebox Cake. Here’s what you’ll need:
- Heavy whipping cream: This is the star of the show, providing a rich and creamy texture that makes every bite heavenly.
- Powdered sugar: A touch of sweetness that helps stabilize the whipped cream, giving it that perfect fluffy consistency.
- Vanilla extract: Just a splash adds depth and warmth to the flavor profile, making it even more delicious.
- Chocolate wafer cookies: These crunchy delights create the cake’s layers, adding a delightful chocolatey contrast to the pumpkin filling.
- Pumpkin puree: The heart of our Halloween theme! It brings a lovely autumn flavor and a beautiful color to the cake.
- Pumpkin spice: A blend of warm spices that enhances the pumpkin flavor, making it feel like fall in every bite.
- Crushed candy corn: For decoration, these sweet treats add a pop of color and a fun Halloween touch.
- Chocolate sprinkles: Another decorative element that adds a bit of crunch and a festive flair to the cake.
For those looking to switch things up, consider adding a bit of cream cheese to the pumpkin mixture for a richer flavor. You can find all the exact measurements at the bottom of the article, ready for printing!
How to Make Halloween Icebox Cake
Now that we have our ingredients ready, let’s get to the fun part—making this Halloween Icebox Cake! Follow these simple steps, and you’ll have a spooktacular dessert that will wow your family and friends.
Step 1: Whip the Cream
Start by pouring the heavy whipping cream into a large mixing bowl. Using an electric mixer, whip the cream on medium speed until soft peaks form. This usually takes about 2-3 minutes. You want it to be fluffy but not too stiff. Trust me, this creamy base is what makes the cake so dreamy!
Step 2: Prepare the Pumpkin Mixture
In another bowl, mix together the pumpkin puree and pumpkin spice. Stir until well combined. The aroma will transport you straight to a cozy autumn day! This mixture adds that festive flavor we all love during Halloween.
Step 3: Combine the Mixtures
Now, gently fold the pumpkin mixture into the whipped cream. Use a spatula and be careful not to deflate the whipped cream. You want to keep that light, airy texture. This step is crucial for achieving the perfect creamy filling for your cake.
Step 4: Layer the Cake
Grab a rectangular dish and start layering! Begin with a layer of chocolate wafer cookies at the bottom. Then, spread a generous layer of the pumpkin cream mixture on top. Repeat this process until you’ve used all the ingredients, finishing with a layer of the pumpkin cream. It’s like building a delicious Halloween castle!
Step 5: Chill the Cake
Cover the dish with plastic wrap and pop it in the fridge. Let it chill for at least 4 hours, or even better, overnight. This allows the cookies to soften and soak up all that pumpkin goodness. Patience is key here, but I promise it’s worth the wait!
Step 6: Decorate and Serve
Once your cake is chilled and ready, it’s time to get creative! Remove the plastic wrap and sprinkle the top with crushed candy corn and chocolate sprinkles. This adds a festive touch that’s perfect for Halloween. Slice it up and serve it to your eager guests. Enjoy the smiles as they take their first bites!
Tips for Success
- Make sure your heavy cream is cold for better whipping results.
- Use a spatula to gently fold the mixtures; this keeps the cream light and fluffy.
- For a richer flavor, consider adding a bit of cream cheese to the pumpkin mixture.
- Chill the cake overnight for the best texture and flavor.
- Feel free to get creative with decorations—use your favorite Halloween candies!
Equipment Needed
- Mixing bowls: A large bowl for whipping cream and a smaller one for the pumpkin mixture. Any size will do!
- Electric mixer: A hand mixer works great, but a whisk can be used if you’re feeling adventurous.
- Spatula: Essential for folding ingredients together without losing air.
- Rectangular dish: Any dish will work, but a glass one lets you see those beautiful layers!
Variations of Halloween Icebox Cake
- Chocolate Pumpkin Icebox Cake: Swap out some of the pumpkin puree for chocolate pudding for a rich, chocolatey twist.
- Gluten-Free Option: Use gluten-free chocolate wafer cookies to make this dessert suitable for those with gluten sensitivities.
- Vegan Version: Substitute heavy cream with coconut cream and use a plant-based whipped topping for a dairy-free delight.
- Spiced Up: Add a dash of cayenne pepper or cinnamon to the pumpkin mixture for a surprising kick!
- Fruit Layer: Incorporate layers of sliced bananas or strawberries between the cookies for added freshness and flavor.
Serving Suggestions for Halloween Icebox Cake
- Pair with Spiced Cider: A warm glass of spiced apple cider complements the flavors beautifully.
- Garnish with Whipped Cream: A dollop of whipped cream on each slice adds extra creaminess.
- Serve with Fresh Fruit: Slices of crisp apples or pears provide a refreshing contrast.
- Presentation: Use Halloween-themed plates and napkins for a festive touch.
- Ice Cream Side: A scoop of vanilla or pumpkin ice cream makes it even more indulgent!
FAQs about Halloween Icebox Cake
Can I make this Halloween Icebox Cake in advance?
Absolutely! In fact, making it a day in advance is a great idea. It allows the flavors to meld beautifully, and the cookies will soften perfectly. Just keep it covered in the fridge until you’re ready to serve.
What can I use instead of chocolate wafer cookies?
If you can’t find chocolate wafer cookies, graham crackers or even Oreos can work as delicious substitutes. Just remember, the flavor will change slightly, but it will still be a tasty treat!
How long can I store leftovers?
Leftover Halloween Icebox Cake can be stored in the fridge for up to 3 days. Just make sure it’s covered well to keep it fresh. But let’s be honest, leftovers are rare with this crowd-pleaser!
Can I use fresh pumpkin instead of canned?
Yes, you can! Just make sure to cook and puree the pumpkin until smooth. Canned pumpkin is convenient, but fresh pumpkin can add a lovely homemade touch to your Halloween Icebox Cake.
Is this dessert suitable for kids?
Definitely! This Halloween Icebox Cake is a hit with kids. The fun decorations and creamy texture make it a delightful treat for little ones. Just keep an eye on the candy corn if you have younger kids around!
Final Thoughts
Creating this Halloween Icebox Cake is more than just making a dessert; it’s about bringing joy and warmth to your home. The laughter shared over slices of this creamy, pumpkin-infused delight is what makes the effort worthwhile. As you gather with family and friends, this cake becomes a centerpiece of celebration, sparking conversations and smiles. I hope this recipe inspires you to embrace the spirit of Halloween with a treat that’s as fun to make as it is to eat. So, roll up your sleeves and let the festivities begin—your loved ones will thank you!
Print
Halloween Icebox Cake: A Spooktacular Delight to Make!
- Total Time: 4 hours 20 minutes
- Yield: 8 servings 1x
- Diet: Vegetarian
Description
A delicious and festive Halloween-themed icebox cake that is easy to make and perfect for any Halloween celebration.
Ingredients
- 2 cups heavy whipping cream
- 1 cup powdered sugar
- 1 teaspoon vanilla extract
- 1 package of chocolate wafer cookies
- 1 cup pumpkin puree
- 1 teaspoon pumpkin spice
- 1/2 cup crushed candy corn for decoration
- 1/2 cup chocolate sprinkles for decoration
Instructions
- In a large bowl, whip the heavy cream until soft peaks form.
- Add the powdered sugar and vanilla extract, and continue to whip until stiff peaks form.
- In another bowl, mix the pumpkin puree and pumpkin spice until well combined.
- Fold the pumpkin mixture into the whipped cream gently until fully incorporated.
- In a rectangular dish, layer the chocolate wafer cookies and pumpkin cream mixture, starting with a layer of cookies.
- Repeat the layers until all ingredients are used, finishing with a layer of the pumpkin cream on top.
- Cover the dish with plastic wrap and refrigerate for at least 4 hours or overnight.
- Before serving, decorate the top with crushed candy corn and chocolate sprinkles.
Notes
- For a richer flavor, you can add a bit of cream cheese to the pumpkin mixture.
- Make sure to let the cake chill long enough for the cookies to soften.
- This cake can be made a day in advance for convenience.
- Prep Time: 20 minutes
- Cook Time: 0 minutes
- Category: Dessert
- Method: No-bake
- Cuisine: American
Nutrition
- Serving Size: 1 slice
- Calories: 350
- Sugar: 25g
- Sodium: 50mg
- Fat: 20g
- Saturated Fat: 10g
- Unsaturated Fat: 8g
- Trans Fat: 0g
- Carbohydrates: 40g
- Fiber: 1g
- Protein: 3g
- Cholesterol: 60mg
Keywords: Halloween Icebox Cake, no-bake dessert, Halloween recipes, pumpkin dessert