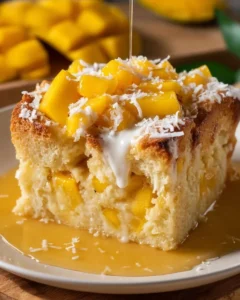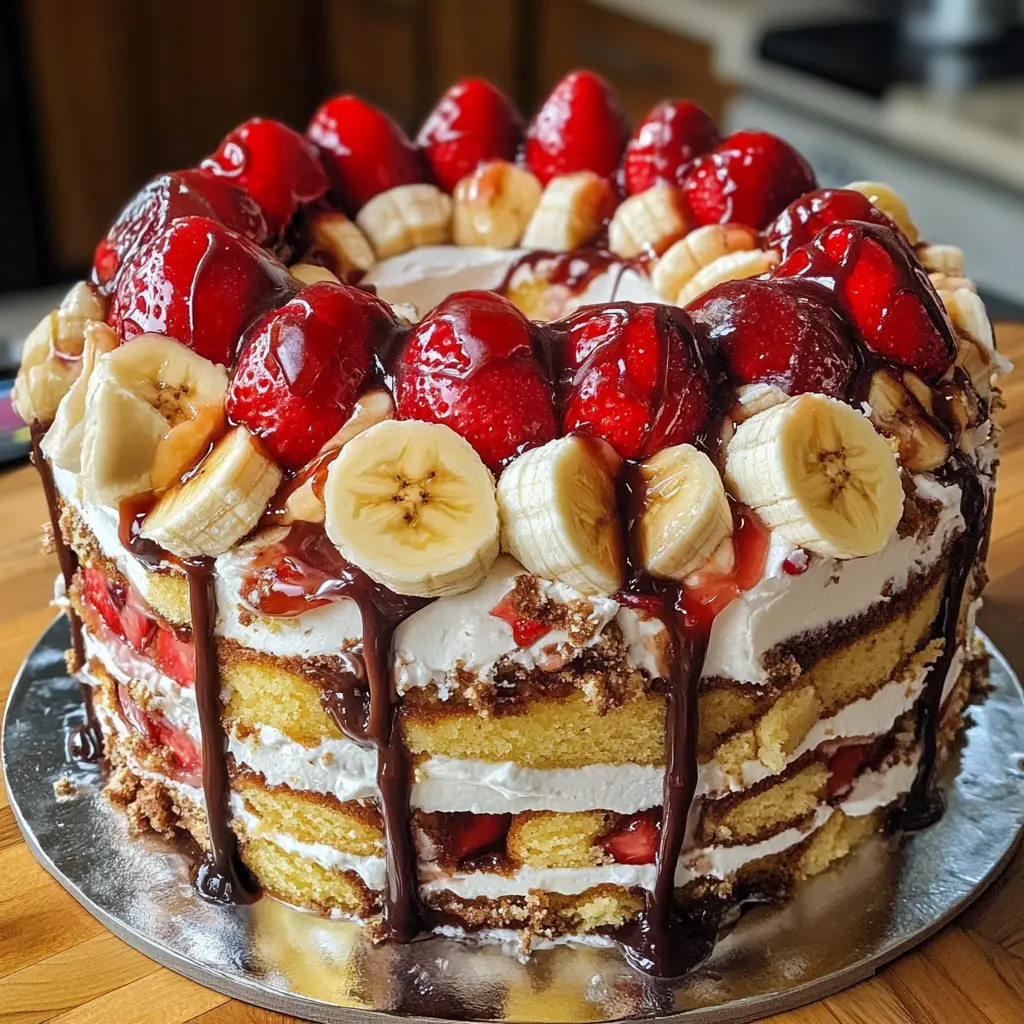
Introduction to Layered Banana Split Cake
As a busy mom, I know how precious time can be, especially when it comes to whipping up something special for my family. That’s why I absolutely adore this Layered Banana Split Cake! It’s a delightful dessert that captures the classic flavors of a banana split, all wrapped up in a beautiful layered cake. Whether it’s a birthday celebration or just a sweet treat after dinner, this cake is sure to impress your loved ones. Plus, it’s surprisingly easy to make, making it the perfect solution for those hectic days when you still want to create something memorable.
Why You’ll Love This Layered Banana Split Cake
This Layered Banana Split Cake is a true crowd-pleaser! It combines the nostalgic flavors of a classic banana split with the ease of a simple cake. You’ll love how quickly it comes together, making it perfect for busy weeknights or last-minute gatherings. The moist layers, creamy whipped topping, and fruity accents create a delightful harmony that will have everyone asking for seconds. Trust me, it’s a dessert that brings smiles all around!
Ingredients for Layered Banana Split Cake
Gathering the right ingredients is the first step to creating this delicious Layered Banana Split Cake. Here’s what you’ll need:
- All-purpose flour: This is the backbone of your cake, providing structure and texture.
- Granulated sugar: Sweetens the cake and helps create that lovely golden crust.
- Unsalted butter: Adds richness and moisture. Make sure it’s softened for easy creaming.
- Large eggs: They bind the ingredients together and contribute to the cake’s fluffiness.
- Buttermilk: This adds a tangy flavor and keeps the cake moist. You can substitute with regular milk mixed with a bit of vinegar.
- Vanilla extract: A must-have for that warm, comforting flavor that enhances the cake.
- Baking powder and baking soda: These leavening agents help the cake rise, making it light and airy.
- Salt: Just a pinch enhances all the flavors in your cake.
- Ripe bananas: The star of the show! They add natural sweetness and moisture. The riper, the better!
- Whipped cream: This creamy layer adds a delightful texture and balances the sweetness.
- Chocolate syrup: Drizzled between layers, it brings that classic banana split flavor to life.
- Crushed pineapple: Adds a fruity twist and a bit of tropical flair. Make sure to drain it well!
- Chopped nuts (optional): For a crunchy texture, sprinkle some on top or between layers.
- Maraschino cherries: These are the perfect finishing touch, adding a pop of color and sweetness.
For exact measurements, check the bottom of the article where you can find everything listed for easy printing. Happy baking!
How to Make Layered Banana Split Cake
Step 1: Preheat and Prepare
First things first, preheat your oven to 350°F (175°C). This ensures your cakes bake evenly. While the oven warms up, grease three 9-inch round cake pans. I like to use a bit of butter or cooking spray to make sure the cakes slide out easily later. Trust me, you don’t want to lose any of that deliciousness!
Step 2: Creaming the Butter and Sugar
In a large bowl, cream together the softened butter and granulated sugar until it’s light and fluffy. This step is crucial! It incorporates air into the mixture, giving your cake that lovely, airy texture. Use an electric mixer on medium speed for about 3-5 minutes. You’ll know it’s ready when it looks pale and fluffy, almost like a cloud!
Step 3: Mixing in the Eggs and Bananas
Now, it’s time to add the eggs, one at a time. Mix well after each addition to ensure they’re fully incorporated. Then, stir in the mashed bananas and vanilla extract. The bananas not only add flavor but also keep the cake moist. I always use very ripe bananas for the best sweetness. It’s like magic!
Step 4: Combining Dry Ingredients
In a separate bowl, combine the all-purpose flour, baking powder, baking soda, and salt. Mixing these dry ingredients separately is important. It ensures that the leavening agents are evenly distributed throughout the flour. This way, your cake rises beautifully and doesn’t have any weird lumps!
Step 5: Mixing the Batter
Now, gradually add the dry ingredients to the banana mixture, alternating with the buttermilk. Start and end with the dry ingredients. Mix until just combined. Be careful not to overmix! A few lumps are perfectly fine. This will keep your cake tender and moist, just like a classic banana split!
Step 6: Baking the Cakes
Divide the batter evenly among the three prepared cake pans. Bake in your preheated oven for 25-30 minutes. To check for doneness, insert a toothpick into the center of the cakes. If it comes out clean, they’re ready! If not, give them a few more minutes. The aroma wafting through your kitchen will be heavenly!
Step 7: Cooling the Cakes
Once baked, let the cakes cool in the pans for about 10 minutes. This helps them set and makes them easier to remove. After that, transfer them to wire racks to cool completely. Cooling is essential; if you layer them too soon, the whipped cream will melt, and we don’t want that!
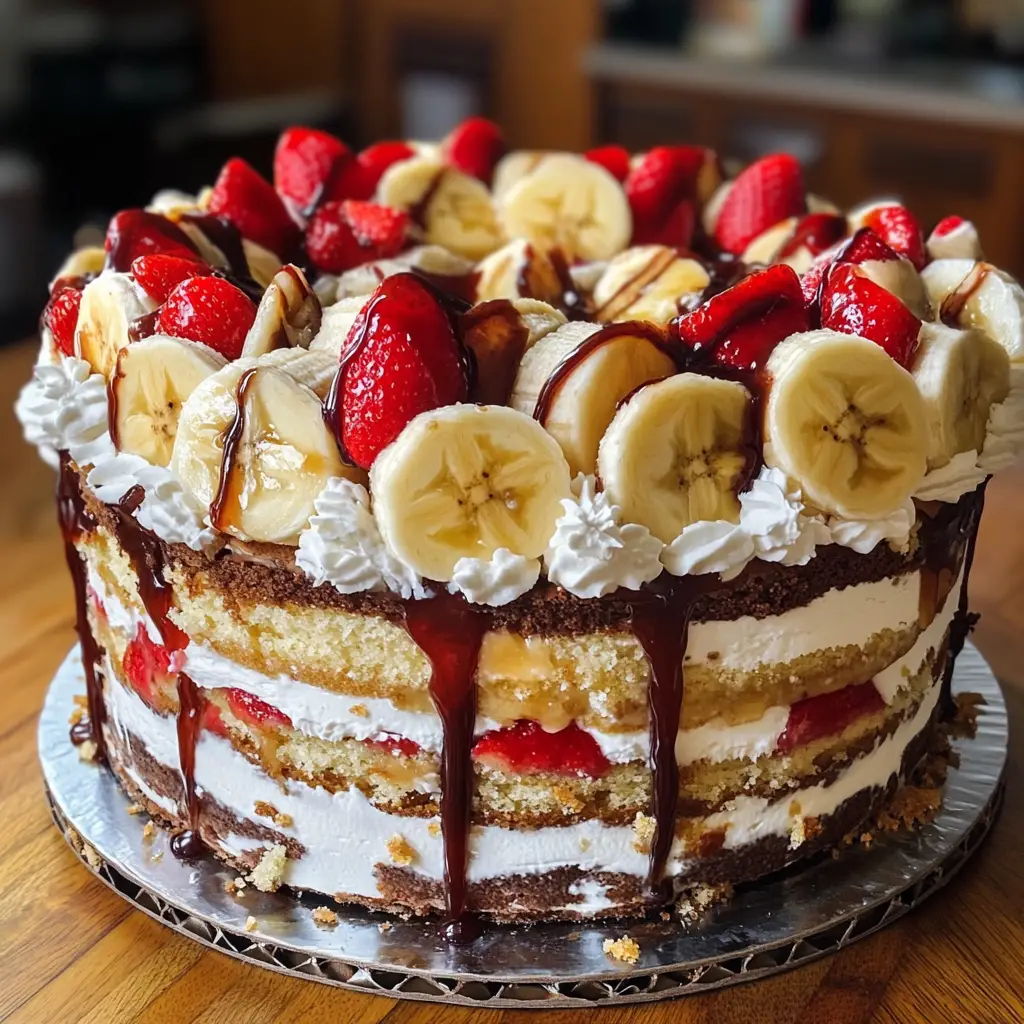
Step 8: Layering the Cake
Once the cakes are completely cool, it’s time to layer! Place one cake layer on a serving plate. Spread a generous layer of whipped cream on top, followed by a drizzle of chocolate syrup and a sprinkle of crushed pineapple. Repeat this process with the second layer. Finally, place the last layer on top and cover the entire cake with whipped cream.
Step 9: Final Touches
Now for the fun part—decorating! Top your cake with more whipped cream, a sprinkle of chopped nuts, and finish it off with maraschino cherries. This adds a pop of color and a touch of nostalgia. Your Layered Banana Split Cake is now ready to be devoured!
Tips for Success
- Use very ripe bananas for maximum sweetness and moisture.
- Don’t overmix the batter; a few lumps are okay!
- Let the cakes cool completely before layering to prevent melting.
- For a richer flavor, consider using brown sugar instead of granulated sugar.
- Feel free to customize with your favorite toppings or add-ins!

Equipment Needed
- Mixing bowls: Use large bowls for mixing. A stand mixer can save time.
- Measuring cups and spoons: Essential for accuracy. A kitchen scale is a great alternative.
- 9-inch round cake pans: If you don’t have these, use square pans instead.
- Electric mixer: A hand mixer works just as well for creaming.
- Wire racks: These help cool the cakes evenly. A plate can work in a pinch.
Variations of Layered Banana Split Cake
- Chocolate Banana Split Cake: Add cocoa powder to the batter for a rich chocolate flavor. Layer with chocolate whipped cream for an extra indulgence.
- Gluten-Free Option: Substitute all-purpose flour with a gluten-free flour blend. Ensure all other ingredients are gluten-free as well.
- Vegan Version: Replace eggs with flaxseed meal and use plant-based butter and non-dairy milk. Use coconut whipped cream for layering.
- Nut-Free Variation: Omit the chopped nuts and use sunflower seeds for a similar crunch without allergens.
- Fruit Medley: Mix in other fruits like strawberries or blueberries between the layers for a colorful twist.
Serving Suggestions for Layered Banana Split Cake
- Pair with a scoop of vanilla ice cream for a classic dessert experience.
- Serve alongside fresh fruit, like sliced strawberries or blueberries, for a refreshing contrast.
- Drizzle extra chocolate syrup on the plate for a beautiful presentation.
- Enjoy with a cup of coffee or a chilled glass of milk.
- Garnish with mint leaves for a pop of color and freshness.
FAQs about Layered Banana Split Cake
Can I make this Layered Banana Split Cake ahead of time?
Absolutely! This cake can be made a day in advance. Just store it in the refrigerator to keep it fresh. The flavors will meld beautifully overnight, making it even more delicious!
What can I substitute for buttermilk?
If you don’t have buttermilk on hand, you can easily make your own. Just mix one cup of regular milk with a tablespoon of vinegar or lemon juice. Let it sit for about 5 minutes, and you’re good to go!
How do I store leftovers?
Store any leftover Layered Banana Split Cake in an airtight container in the refrigerator. It should stay fresh for about 3-4 days. Just be sure to keep it covered to maintain its moisture!
Can I freeze this cake?
Yes, you can freeze the cake! Just wrap it tightly in plastic wrap and then in aluminum foil. It can be frozen for up to 3 months. Thaw it in the fridge overnight before serving.
What other toppings can I use?
The sky’s the limit! You can add fresh fruit, chocolate shavings, or even a drizzle of caramel sauce. Get creative and make it your own!
Final Thoughts
Creating this Layered Banana Split Cake is more than just baking; it’s about bringing joy to your family and friends. The delightful layers of banana, whipped cream, and chocolate syrup create a symphony of flavors that evoke sweet memories. Each slice is a reminder that even on the busiest days, we can carve out moments of happiness. So, whether it’s a special occasion or a simple weeknight treat, this cake is sure to bring smiles and laughter to your table. Trust me, the joy of sharing this dessert is as sweet as the cake itself!
Print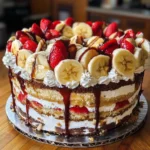
Layered Banana Split Cake: Indulge in Delicious Layers!
- Total Time: 1 hour
- Yield: 12 servings 1x
- Diet: Vegetarian
Description
A delightful dessert that combines the classic flavors of a banana split into a layered cake, perfect for any occasion.
Ingredients
- 2 cups all-purpose flour
- 1 ½ cups granulated sugar
- 1 cup unsalted butter, softened
- 4 large eggs
- 1 cup buttermilk
- 1 teaspoon vanilla extract
- 1 teaspoon baking powder
- 1 teaspoon baking soda
- ½ teaspoon salt
- 3 ripe bananas, mashed
- 1 cup whipped cream
- ½ cup chocolate syrup
- ½ cup crushed pineapple, drained
- ½ cup chopped nuts (optional)
- Maraschino cherries for topping
Instructions
- Preheat the oven to 350°F (175°C) and grease three 9-inch round cake pans.
- In a large bowl, cream together the butter and sugar until light and fluffy.
- Add the eggs one at a time, mixing well after each addition.
- Stir in the mashed bananas and vanilla extract.
- In another bowl, combine the flour, baking powder, baking soda, and salt.
- Gradually add the dry ingredients to the banana mixture, alternating with buttermilk, and mix until just combined.
- Divide the batter evenly among the prepared cake pans.
- Bake for 25-30 minutes or until a toothpick inserted in the center comes out clean.
- Let the cakes cool in the pans for 10 minutes, then transfer to wire racks to cool completely.
- Once cooled, layer the cakes with whipped cream, chocolate syrup, and crushed pineapple in between each layer.
- Top the cake with additional whipped cream, nuts, and maraschino cherries.
Notes
- For a richer flavor, use brown sugar instead of granulated sugar.
- Make sure the bananas are very ripe for the best taste.
- This cake can be made a day in advance and stored in the refrigerator.
- Prep Time: 30 minutes
- Cook Time: 30 minutes
- Category: Dessert
- Method: Baking
- Cuisine: American
Nutrition
- Serving Size: 1 slice
- Calories: 350
- Sugar: 25g
- Sodium: 200mg
- Fat: 15g
- Saturated Fat: 8g
- Unsaturated Fat: 5g
- Trans Fat: 0g
- Carbohydrates: 50g
- Fiber: 2g
- Protein: 4g
- Cholesterol: 50mg
Keywords: Layered Banana Split Cake, Banana Cake, Dessert, Layered Cake