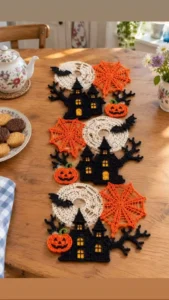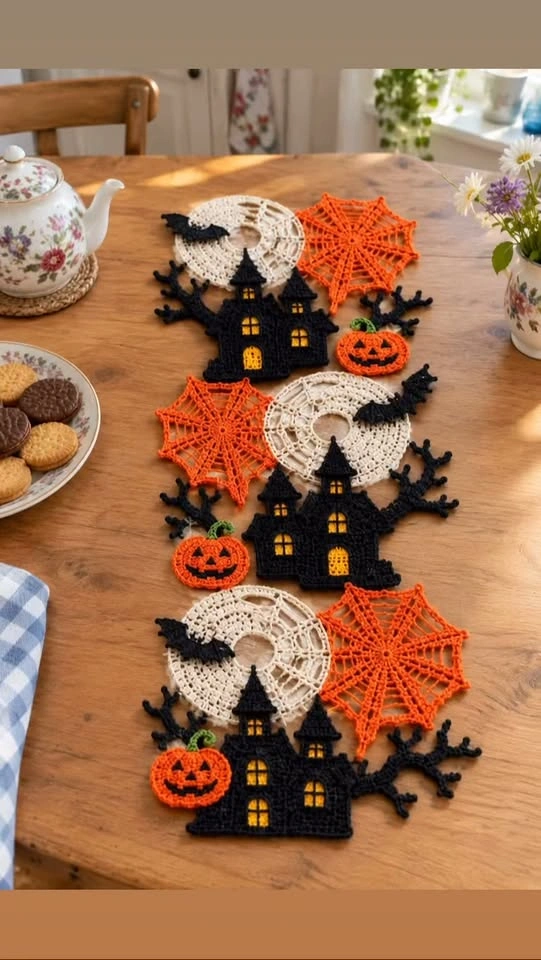
Looking for a fun way to give your dining table a handmade Halloween makeover? This Spooky Halloween Table Runner Pattern is a festive crochet project that combines classic Halloween colors, playful spooky motifs, and cozy handmade texture.
With pumpkins, ghosts, spiderwebs, bats, or other Halloween-inspired details worked into the design, this crochet table runner can instantly transform an ordinary table into a seasonal centerpiece. It works beautifully on a dining table, coffee table, console, sideboard, or entryway display.
Whether you’re decorating for a Halloween party or simply love filling your home with handmade seasonal pieces, this crochet Halloween table runner is a project you’ll want to bring out every October.
Why You’ll Love This Halloween Table Runner
There are plenty of Halloween decorations you can buy, but handmade crochet decor has a character all its own.
This pattern is especially fun because you can customize almost every part of it.
- 🎃 Perfect for Halloween decorating
- 👻 Fun spooky motifs without being overly scary
- 🧶 Great way to use seasonal yarn colors
- 🕸️ Easy to customize to match your home
- 🦇 Can be made longer or shorter for different tables
- 🍂 Reusable year after year
- 🎁 Makes a creative handmade Halloween gift
The finished runner can become the centerpiece of an entire Halloween tablescape.
Materials You’ll Need
Exact yarn amounts will depend on the finished size of your runner and how many decorative motifs you add.
Yarn
Choose a medium-weight yarn in your favorite Halloween colors.
Good choices include:
- Black
- Pumpkin orange
- White or cream
- Deep purple
- Charcoal gray
- Dark green
For a classic Halloween look, use black as the main color and add orange and white accents.
Cotton yarn is particularly nice for table decor because it creates defined stitches and tends to lie flat. Acrylic yarn can also work well and is often an affordable option for larger projects.
Crochet Hook
Use a hook appropriate for your chosen yarn. For medium-weight yarn, approximately 4.0–5.0 mm is a good starting range.
Always check your yarn label and adjust the hook size if your stitches feel too tight or too loose.
Additional Supplies
You’ll also need:
- Yarn needle
- Scissors
- Stitch markers
- Measuring tape
- Blocking pins
- Blocking mat or clean towel
Optional embellishments can include crochet pumpkins, ghosts, bats, spiders, or small tassels.
Suggested Finished Size
A versatile starting size for a crochet table runner is approximately:
14–16 inches wide × 48–60 inches long
However, one of the advantages of crocheting your own table runner is that you can customize the dimensions.
For a smaller coffee table, make a shorter runner.
For a long dining table, simply continue repeating the main pattern until you reach the desired length.
How to Choose the Right Length
Measure your table before beginning.
For a traditional runner that stays on top of the table, make it several inches shorter than the tabletop.
If you prefer the runner to hang over both ends, add approximately 6–10 inches of overhang on each side.
Crochet Abbreviations
This pattern can be worked using common US crochet terminology.
- ch – chain
- sc – single crochet
- hdc – half double crochet
- dc – double crochet
- sl st – slip stitch
- st/sts – stitch/stitches
- sp – space
- rep – repeat
- FO – fasten off
If you’re using a specific motif chart or stitch pattern, keep it nearby as you work through the runner.
How to Crochet the Spooky Halloween Table Runner
Step 1: Choose Your Color Palette
Start by deciding what kind of Halloween atmosphere you want.
For a traditional spooky runner, try:
Black + orange + white
For something more gothic:
Black + charcoal + deep purple
For a softer farmhouse Halloween look:
Cream + muted orange + black
Choosing your colors before beginning makes it easier to keep the entire project visually balanced.
Step 2: Create the Foundation Chain
Chain enough stitches to reach the desired width of your table runner.
A width of around 14–16 inches works well for many dining tables.
Keep the foundation chain relaxed. If it’s too tight, the bottom edge of the runner may pull inward.
You can even use a crochet hook one size larger for the foundation chain before switching back to your regular hook.
Step 3: Crochet the Main Runner Body
Work your chosen stitch pattern across the foundation.
A simple combination of single crochet, half double crochet, double crochet, and open chain spaces can create a beautiful textured background without competing with the Halloween decorations.
Continue working rows until the runner reaches your desired length.
Count your stitches regularly to make sure the sides stay straight.
Step 4: Add Spiderweb-Inspired Sections 🕸️
Open crochet sections are perfect for creating the appearance of spiderwebs.
You can create these areas using combinations of:
- Chains
- Double crochet
- Chain spaces
- Slip stitches
Place the web-inspired sections near the ends of the runner or incorporate them throughout the body.
Black yarn creates a dramatic gothic effect, while white or cream webs stand out beautifully against a darker background.
Step 5: Crochet the Halloween Motifs
Now comes the most entertaining part: adding the spooky decorations.
Crochet Ghost 👻
Use white or cream yarn to create a small ghost shape.
A simple ghost can be made with a rounded head that gradually widens into the body. Finish the bottom with small scallops or waves.
Black yarn can be used to embroider tiny eyes.
Crochet Pumpkin 🎃
Start with orange yarn and crochet a small circle or oval.
Use increases to create the rounded pumpkin shape.
Add a small green or brown stem at the top.
For extra texture, use surface crochet or embroidery to create the pumpkin’s vertical sections.
Crochet Bat 🦇
Use black yarn for a tiny bat silhouette.
A small central body with pointed wings works beautifully as an appliqué.
Crochet Spider 🕷️
Create a tiny black circle for the spider’s body and add simple embroidered or crocheted legs.
Even one small spider placed near a web section can add a playful Halloween detail.
Step 6: Arrange the Decorations
Before attaching anything permanently, place all your crochet motifs on the finished runner.
Move them around until the arrangement feels balanced.
For example, you might place:
Pumpkin → Web → Ghost → Bat → Web → Pumpkin
You don’t need perfect symmetry. Slightly irregular placement can make the runner feel more playful and handmade.
Step 7: Attach the Motifs
Thread a yarn needle with matching yarn.
Carefully sew each appliqué onto the runner, working around the edges while keeping the stitches discreet.
Make sure each decoration is securely attached, especially if you plan to wash or store the runner regularly.
Step 8: Add the Border
A border gives the table runner a polished finish.
Simple options include:
- Single crochet border
- Scalloped edging
- Picot edging
- Black-and-orange striped border
For a spooky gothic appearance, a pointed or picot-style border works particularly well.
Step 9: Weave In the Ends
Use a yarn needle to weave all loose yarn ends securely into the back of the work.
Avoid simply cutting the yarn close to the knot because the stitches may eventually unravel.
Step 10: Block Your Table Runner
Blocking can make a dramatic difference in the finished appearance.
Gently dampen the runner and lay it flat on a blocking mat or clean towel.
Carefully straighten the sides and corners.
Pin the runner into the desired shape and allow it to dry completely.
Blocking is especially helpful if your design includes openwork or spiderweb-style sections.
Halloween Color Combination Ideas
You don’t have to stick with traditional orange and black.
Classic Halloween
- Black
- Bright orange
- White
Haunted House
- Charcoal
- Black
- Deep purple
- Gray
Vintage Halloween
- Burnt orange
- Cream
- Mustard
- Black
Farmhouse Halloween
- Ivory
- Muted pumpkin
- Sage
- Charcoal
Cute Halloween
- Lavender
- Pastel orange
- White
- Soft black
Changing the colors can completely transform the personality of the same crochet pattern.
Ways to Customize Your Table Runner
Once you understand the basic construction, there are countless ways to make the pattern your own.
Make It Longer
Simply continue the main repeat until the runner reaches your desired length.
Make It Wider
Increase the foundation chain while keeping your stitch repeat consistent.
Add More Ghosts
Create several small ghosts and scatter them along the runner for a playful haunted-table effect.
Create Pumpkin Ends
Add larger crochet pumpkins near both ends of the runner to create visual anchors.
Add Fringe
Short black, orange, or cream fringe can give the ends extra movement and texture.
Keep It Minimal
For a more sophisticated Halloween look, use a black runner with only a few subtle spiderweb motifs.
Tips for the Best Results
Keep your tension consistent. Uneven tension can cause the runner to become wider or narrower as you crochet.
Measure while working. Don’t rely only on the number of rows because yarn and tension can dramatically change the finished dimensions.
Block the finished piece. This is particularly important for table runners because straight edges make the finished project look much more professional.
Use lightweight decorations. Very thick appliqués may prevent dishes or decorations from sitting evenly on the table.
Secure every yarn end. Seasonal decor is often folded and stored for months, so properly woven ends help the project last longer.
How to Style Your Halloween Crochet Table Runner
Place the finished runner down the center of your dining table and build your Halloween display around it.
Try pairing it with:
- Mini pumpkins
- Black candlesticks
- LED candles
- Small decorative ghosts
- Autumn leaves
- Halloween mugs
- Wooden serving boards
- Black or orange napkins
- Small lanterns
For a simpler look, place several pumpkins down the center and allow the crochet details to provide most of the decoration.
The runner can also be used on a console table, fireplace mantel, buffet, dresser, coffee table, or entryway table.
Care and Storage
Always follow the washing instructions for the yarn you used.
For many crochet table runners, gentle hand washing is the safest option.
Use cool or lukewarm water with mild detergent and avoid aggressive twisting or wringing.
Lay the runner flat to dry and reshape it while damp.
After Halloween, make sure the runner is completely clean and dry before storing it.
Fold it loosely and place it somewhere protected from moisture and direct sunlight.
Frequently Asked Questions
Is this Halloween table runner beginner-friendly?
It can be. The main runner can be made using basic crochet stitches, while the decorative motifs add slightly more detailed work. Beginners can simplify the project by using fewer appliqués.
What yarn is best for a crochet table runner?
Cotton yarn is an excellent choice because it provides good stitch definition and creates a sturdy fabric. Acrylic yarn can also be used.
How long should a crochet table runner be?
There’s no required size. Measure your table and decide whether you want the runner to stay entirely on top or hang over the ends.
Can I make the runner without the appliqués?
Absolutely. You can create a more subtle Halloween design using only black and orange stripes, openwork spiderweb sections, or textured stitches.
Can I use different Halloween motifs?
Yes. Try adding witches’ hats, candy corn, skulls, black cats, moons, stars, or tiny haunted houses.
Can I use this pattern for other holidays?
The basic runner construction can easily be adapted. Change the colors and appliqués to create Christmas, Thanksgiving, Easter, or autumn versions.
Spooky Halloween Table Runner Pattern Summary
Skill Level: Beginner to Intermediate
Project Type: Crochet Table Runner
Style: Halloween / Spooky / Seasonal Home Decor
Yarn: Medium-weight cotton or acrylic
Hook: Approximately 4.0–5.0 mm, adjusted for yarn
Suggested Width: 14–16 inches
Suggested Length: 48–60 inches or customized to your table
Main Techniques: Chains, single crochet, half double crochet, double crochet, slip stitches, appliqué, simple openwork
Optional Motifs: Ghosts, pumpkins, bats, spiders, and spiderwebs
Final Thoughts
A Spooky Halloween Table Runner is a fun way to bring handmade personality to your Halloween decorating. The combination of crochet texture, spooky motifs, and classic seasonal colors creates something much more memorable than ordinary store-bought decor.
Keep it traditional with black, orange, and white, or create your own color palette to match your Halloween style. Add pumpkins, ghosts, bats, spiderwebs, or any other spooky motifs you love.
Best of all, once Halloween is over, carefully store your handmade runner and bring it back out next October for another season of spooky decorating. 🎃👻🕸️