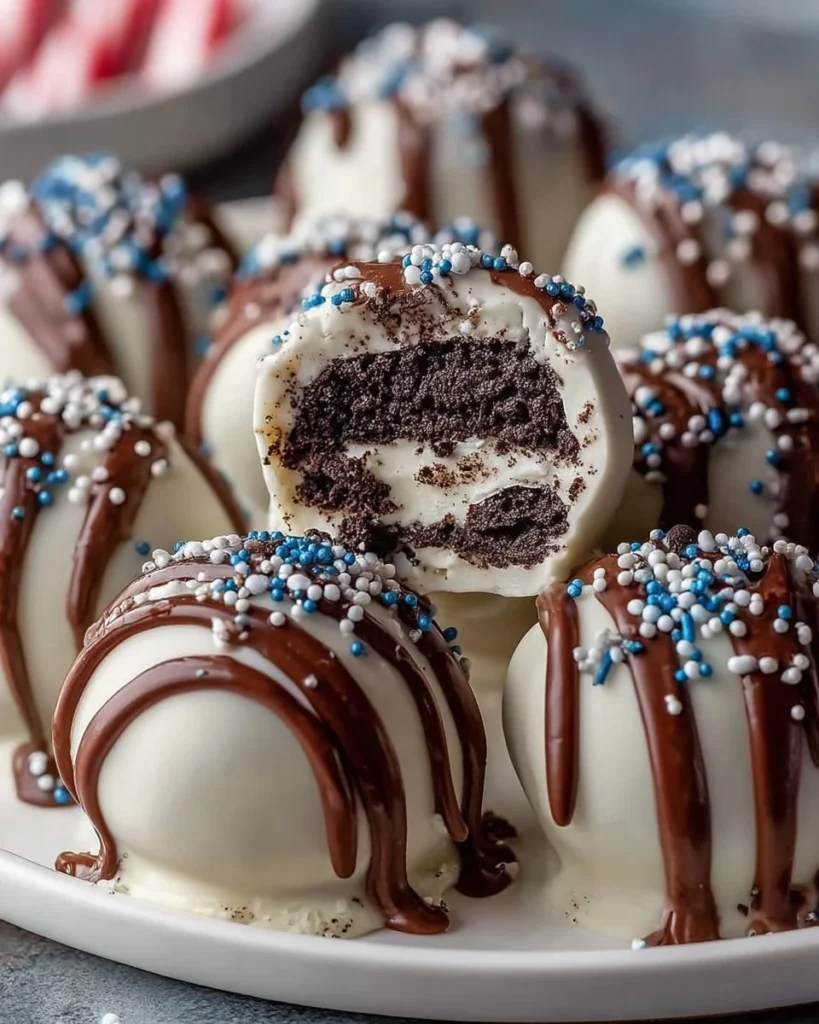
Beneath the glimmer of kitchen lights, a small miracle unfolds—making Quick Oreo Chocolate Truffle Bites! Picture this: you take a luscious bite and immediately melt into a world of rich, velvety chocolate hugging a creamy, cookie-infused center. With that first taste, you encounter a delightful contrast—the crunch of the crushed Oreos mingling with the silky sweetness of cream cheese, creating a dessert that feels both indulgent and delightful. It’s a no-bake joy, a sweet treat that dances on your palate and brings joy with every morsel.
Close your eyes as you imagine the delightful aroma that fills your kitchen—a symphony of chocolate and vanilla wafting together as you prepare this scrumptious treat. You can almost hear the crackling of the chocolate coat as you break into the truffle, revealing the decadent filling inside. With sprinkles or crushed Oreos adorning their tops, these truffles not only taste incredible but also shine with a beautiful presentation, making them perfect for any occasion. Friends and family will gather around, excitedly reaching out for just one more bite!
Why You’ll Love This Quick Oreo Chocolate Truffle Bites
Several reasons elevate these Quick Oreo Chocolate Truffle Bites above typical desserts. The harmony of flavors delivers a fantastic payoff for minimal effort. Imagine a busy weekday evening or a weekend gathering, and suddenly you feel the tug of a sweet craving. With just a handful of ingredients and a little bit of time, you create a treat that not only satisfies your sweet tooth but also brings smiles to those around you.
These delightful morsels shine at gatherings, from birthday parties to cozy movie nights. Their rich taste and creamy texture provide an enchanting experience as soon as they touch your tongue. Beyond their yum factor, these truffles come together quickly. You can easily prepare them with your kids or as a delightful surprise for someone special. Their versatility and charm make them a standout in your dessert repertoire!
Preparation Phase & Tools to Use
Before diving into this chocolate dream, you’ll need some essential tools. Having the right equipment on hand not only simplifies the process but also ensures delightful results.
-
Food Processor: This kitchen star will turn your Oreo cookies into fine crumbs in mere seconds. You want a consistent crumb to achieve that perfectly smooth filling.
-
Mixing Bowl: A sturdy, medium-sized bowl is perfect for combining the cream cheese and Oreo crumbs, allowing you to mix effortlessly.
-
Baking Sheet: Line your baking sheet with parchment paper to prevent sticking and make for easy cleanup once you’re done.
-
Microwave-Safe Bowl: This is vital for melting your chocolate. Use short heating intervals to ensure a smooth texture without burning.
Preparation Tip: To speed things along, gather your ingredients and tools before you start. Having everything at hand makes the process seamless and enjoyable!
Ingredients for Quick Oreo Chocolate Truffle Bites
-
1 package Oreo cookies (about 36 cookies): These classic cookies provide the perfect balance of chocolate and cream. Feel free to switch them out for gluten-free Oreos if needed.
-
8 oz cream cheese, softened: Cream cheese adds richness and creaminess. You can substitute with vegan cream cheese for a dairy-free version.
-
8 oz chocolate (dark or milk, for coating): The chocolate coating is your dessert’s outer shell. Choose your favorite type for a touch of tailored flavor.
-
Sprinkles or crushed Oreos for decorating (optional): Toppings add a playful touch, making your truffles even more irresistible. Get creative with colors and textures!
How to Make Quick Oreo Chocolate Truffle Bites
-
Crush the Oreos: Use your food processor to pulse the Oreo cookies until they resemble fine crumbs. You want a sandy texture—nothing too chunky!
-
Mix with Cream Cheese: In a mixing bowl, combine the Oreo crumbs with softened cream cheese. Stir until the mixture becomes cohesive and well-blended. This might take a bit of elbow grease, but your reward will be worth it!
-
Roll into Balls: Scoop out the mixture and roll it into bite-sized balls, approximately one inch in diameter. Each truffle should feel firm enough to stand on its own. Place each ball on the lined baking sheet, leaving space between them for coating later.
-
Freeze: Pop the baking sheet into the freezer for about 30 minutes. This allows the truffle base to firm up, making it easier to coat.
-
Melt the Chocolate: In a microwave-safe bowl, heat your chocolate in intervals of 30 seconds, stirring after each session until smooth. Keep an eye on it to avoid overheating!
-
Dip and Coat: Remove the frozen truffles and dip each one into the melted chocolate, letting the excess drip off. Place them back on the baking sheet. The glossy finish of the chocolate will make them look even more tempting!
-
Add Toppings: Before the chocolate sets, sprinkle crushed Oreos or colorful sprinkles on top. This adds flair and a little crunch!
-
Chill and Set: Refrigerate the coated truffles for 15-20 minutes until the chocolate firms up. The moment they come out, they’ll be irresistible!
-
Serve and Enjoy!: Delight in your creations. Watch as smiles widen, laughter echoes, and joy fills the air with each flavorful bite!
Chef’s Notes & Helpful Tips
-
Make-ahead tips: You can prepare the truffles a day in advance. Store them in the refrigerator and take them out shortly before serving.
-
Cooking alternatives: If you prefer, use an air fryer for a unique twist! Simply set it to 350°F and air fry for about 8-10 minutes after coating for a crunchy shell.
-
Customization ideas: Add flavor extracts like peppermint or raspberry to the cream cheese for an unexpected twist. You can also experiment with different toppings—chopped nuts or coconut flakes make for delicious alternatives!
Common Mistakes to Avoid
One common mistake is not allowing the truffles to chill long enough before coating. This can lead to a messy chocolate dip where the filling oozes out. Ensure you provide enough time in the freezer for the truffles to firm up.
Another pitfall lies in melting chocolate. Rushing the process can lead to a burnt, gritty coating. Stir gently and often, allowing the heat to work its magic gradually.
What to Serve With Quick Oreo Chocolate Truffle Bites
Pair these truffles with a variety of accompaniments for an elevated experience:
-
Coffee: The bold flavor of coffee deepens the sweet notes of the truffles, creating a divine combination.
-
Ice Cream: A scoop of vanilla or mint ice cream contrasts beautifully with the rich chocolate and Oreos.
-
Fresh Berries: The tartness of raspberries or strawberries provides a refreshing balance to the sweetness.
-
Milk: This classic pairing enhances the chocolate flavor—perfect for a nostalgic dive into childhood treats.
-
Chocolate Sauce: Drizzling extra chocolate sauce creates an indulgent moment every time.
-
Nut Butter: A dollop of almond or peanut butter adds a nutty richness that pairs well with chocolate.
Storage & Reheating Instructions
Store any leftovers in an airtight container in the refrigerator for up to a week. You can freeze them for up to three months—just be sure to layer them between parchment paper to prevent sticking. There’s no need to reheat; simply enjoy them cold or let them sit at room temperature for a few minutes to soften.
Estimated Nutrition Information
Approximate nutrition values (per truffle):
- Calories: 150
- Total Fat: 9g
- Saturated Fat: 4.5g
- Carbohydrates: 15g
- Sugar: 10g
- Protein: 2g
(Note: Nutritional values may vary based on specific ingredients and portions.)
FAQs
1. Can I use different types of cookies?
Yes! While Oreos are classic, feel free to use other sandwich cookies for unique flavors like peanut butter or mint. Just ensure they offer a similar texture.
2. How can I prevent the chocolate from cracking?
Allow the chocolate to temper slightly before dipping. Furthermore, avoid refrigerating immediately after coating as rapid temperature changes can result in cracks.
3. Can I make them dairy-free?
Absolutely! Replace the cream cheese with vegan cream cheese and choose dairy-free chocolate for a delightful non-dairy alternative.
4. Can I use flavored cream cheese?
Certainly! Flavored cream cheese, like strawberry or chocolate, can lend an exciting twist to your truffles. Just keep in mind the balance of sweetness!
5. How do I ensure even coating?
Using a fork to dip and coat each truffle can help ensure an even layer of chocolate. It gives you control over drippage too!
Conclusion
Creating Quick Oreo Chocolate Truffle Bites transforms any moment into a celebration of sweetness and joy. With just a few ingredients, these delightfully rich truffles will surely bring smiles and laughter to any gathering or personal treat time. Share your creations with friends, or savor them all for yourself—we won’t tell! Dive into this easy and fun recipe, ensuring you satisfy those dessert cravings with style and deliciousness.
Print
Quick Oreo Chocolate Truffle Bites
- Total Time: 45 minutes
- Yield: 12 servings 1x
- Diet: Vegetarian
Description
Indulge in these rich and creamy no-bake Oreo chocolate truffles, filled with a delightful cookie-infused center and coated in luscious chocolate.
Ingredients
- 1 package Oreo cookies (about 36 cookies)
- 8 oz cream cheese, softened
- 8 oz chocolate (dark or milk, for coating)
- Sprinkles or crushed Oreos for decorating (optional)
Instructions
- Crush the Oreos: Use your food processor to pulse the Oreo cookies until they resemble fine crumbs.
- Mix with Cream Cheese: In a mixing bowl, combine the Oreo crumbs with softened cream cheese.
- Roll into Balls: Scoop out the mixture and roll it into bite-sized balls, about one inch in diameter.
- Freeze: Pop the baking sheet into the freezer for about 30 minutes to firm up the truffles.
- Melt the Chocolate: In a microwave-safe bowl, heat your chocolate until smooth, stirring often.
- Dip and Coat: Remove the frozen truffles and dip each one into the melted chocolate.
- Add Toppings: Before the chocolate sets, sprinkle crushed Oreos or colorful sprinkles on top.
- Chill and Set: Refrigerate for 15-20 minutes until the chocolate firms up.
- Serve and Enjoy!: Delight in your creations with friends and family.
Notes
You can prepare the truffles in advance and store them in the refrigerator. Feel free to customize with different toppings or flavor extracts.
- Prep Time: 15 minutes
- Cook Time: 0 minutes
- Category: Dessert
- Method: No-Bake
- Cuisine: American
Nutrition
- Serving Size: 1 truffle
- Calories: 150
- Sugar: 10g
- Sodium: 200mg
- Fat: 9g
- Saturated Fat: 4.5g
- Unsaturated Fat: 4.5g
- Trans Fat: 0g
- Carbohydrates: 15g
- Fiber: 1g
- Protein: 2g
- Cholesterol: 20mg
Keywords: Oreo truffles, chocolate truffles, no-bake dessert